
All Contacts & Members Overview
Contacts & Members Overview
The Contacts area is the central hub for managing everyone in your platform – from leads and customers to registered members and community participants.
Here you can view, filter, segment, tag, and manage contacts, as well as control Member Groups and their settings.
This view is designed to give you both high-level insight and hands-on control over your audience.
Navigating to Contacts
To access Contacts and Members, go to Contacts > All Contacts & Members
This opens the main Contacts view, which is divided into three main areas

- Left panel – Segments & Member Groups
- Top controls – Filters, actions, and view settings
- List view – The contacts or members currently displayed
Each section works together to help you quickly find, organize, and manage the right people.
1. Left Panel – Segments & Member Groups
The left-hand panel is your navigation and structure layer. It lets you quickly switch between saved views and membership groupings.

Segments
Segments are saved filters that help you group contacts dynamically based on rules.
Default segments
Some segments always exist by default, such as:
- All Contacts
- Created last 7 days
- Created last 30 days
These update automatically, just like custom segments you create.
Custom segments
You can create your own segments by:
- Applying filters in the main view
- Clicking Save Segment
- Giving the segment a name
Once saved, the segment appears in the left panel and updates automatically as contacts match (or no longer match) the rules.
Use cases for segments:
- New leads this month
- Customers with a specific tag
- Members from a certain country
- Contacts from a specific campaign (UTM-based)
Member Groups
Member Groups control access and permissions across your platform (for memberships, gated content, communities, pages, etc.).
In the left panel, you can:
- View all existing member groups
- Click a group to see only members in that group
- Edit the global Members Settings
- Create a new group using + Add Group
Members Settings (Global)
From the Members area, you control the global behavior for how members are created, approved, and managed across your entire platform.

These settings apply to all member registrations, regardless of whether members join via a checkout, form, funnel, or manual addition.

From this section, you can configure:
-
Allow registrations
Enable or disable whether new users can register as members on your platform.
This is especially useful if you want to:
- Capture leads through free offers or freebies
- Allow users to register without paying
- Grant access to free gated content, previews, or lead magnets
- Build an audience before monetization
-
Require member approval
Decide if new registrations must be manually approved before gaining access. This can be useful for invite-only communities or controlled onboarding.
-
Send email notification on new registration
Automatically notify your team when a new member signs up.
-
Email for member notifications
Specify which email address should receive registration notifications.
Default group for new members
Choose which Member Group new members are automatically added to when they register.
Every member must belong to at least one Member Group. When someone registers (without purchasing), they are assigned to this default group.
When a customer purchases a Membership Product:
- The member is first assigned to the default group (e.g. Basic Members) when they click Complete Purchase
-
The specific member group tied to the membership product is assigned only after payment is successfully completed
This ensures proper access control and prevents unpaid users from accessing protected content.
These settings define the baseline member experience—from lead capture and free access to paid memberships and onboarding. Configuring them correctly ensures smooth registration flows, secure access handling, and a scalable foundation for both free and paid member journeys.
Creating a Member Group
-
Click + Add Group

-
Enter a group name
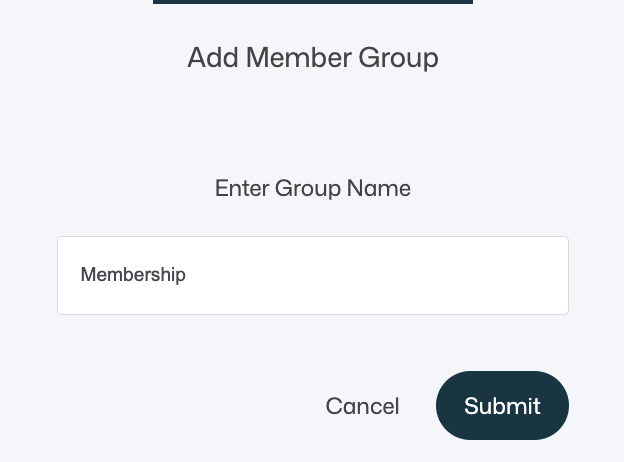
- Submit to create the group


The group becomes immediately available for:
- Membership products
- Access control
- Manual member assignment
Member Group Settings
Click a member group, then click Show group settings to manage it.

Once expanded you can now edit the Member Group settings:

From here you can:
- Set a Redirect URL
- Rename the group
- Delete the group
Redirect URL behavior
When a redirect URL is set:
- Members are redirected to that URL immediately after login
If a member belongs to multiple groups with different redirect URLs:
- They are sent to the Member Profile page
- From there, they can choose where to go after login
This prevents conflicts and ensures a clear user experience.
2. Top Controls – Filters, Actions & View Settings
The top section of the main window controls what is shown in the list and what actions you can take.

Filters
Click Add Filter to narrow down contacts.
Available filter fields include:
- Name
- Phone
- First Seen
- Signed Up
- Member Group
- Tag
- Address, City, State, Zip / Postal Code, Country
- Company Name
- UTM Source, Medium, Campaign, Term, Content
Each filter supports operators such as:
- is / is not
- starts with
- ends with
- contains / doesn’t contain
- is unknown
- has any value
Filter logic
- All filters use AND logic
- This means every condition must be true for a contact to appear in the filtered list view
Example:
- Tag contains
customer - AND Member Group is
Membership - AND Country is
Sweden
Only contacts matching all conditions are shown.
Saving Filters as Segments
Once filters are applied:
- Click Save Segment
- Name the segment

This turns your filter logic into a reusable, dynamic view in the left panel.
Tag
Use Tag to:
- Add tags to all selected contacts in the list
- This is helpful for adding tags in bulk
💡Tip
You can trigger automations you have set up in advance by assigning tags in bulk – this can save you a lot of time not having to manually do repeatable tasks in the platform
Tags are commonly used for:
- Automations
- Email segmentation
- CRM organization
More menu
The More menu includes bulk actions.

- Import – Upload contacts via file
- Export – Download selected contacts
- Add contacts to list
- Remove contacts from list
- Remove a tag
- Delete – Permanently remove contacts
These actions apply to all currently selected contacts.
Add Contact
Click + Add Contact to create a contact manually.
You can enter:
- Name

Once the contact is added to the system you can view their profile to add additional information.
This is useful for:
- Internal testing
- Manual onboarding
- Admin-created members
💡 Note
Most contacts are created automatically when someone:
- Purchases a product
- Submits a form or quiz
- Registers for a membership or member group
Columns
Use Columns to toggle which fields are visible in the list view, helping you tailor the interface to your workflow.
Available column options:
- Name
- Phone
- Address
- City
- State
- Zip / Postal Code
- Country
- Company Name
- UTM Source
- UTM Medium
- UTM Campaign
- UTM Term
- UTM Content
- Tags
- Created
3. List View – Contacts & Members
The list view displays all contacts matching the current segment or filters.

Each row represents one contact and can include:
- Name
- Phone
- Tags
- Creation date
- Additional enabled columns
From here you can:
- Select one or multiple contacts
- Click on a contact to open their profile
- Apply tags
- Use bulk actions
- Export data
- Delete contacts
When viewing a Member Group, the same list view is used – but actions will also apply group membership. So if you for instance add a member ur use the bulk import function from the member view, these contacts will also be assigned to that member group.
Managing Members from a Group
When a member group is selected:
- All actions under More are still available
- Added contacts are automatically included in the selected Member group
You can also:
- Manually add members to the group using + Add Member
- Manage members without switching views
This keeps contact and membership management unified.
Summary
The Contacts > All Contacts & Members view is your central control center for audience management.
From here, you can:
- Filter and segment contacts with precise logic
- Save dynamic segments for reuse
- Tag and manage contacts in bulk
- Create and manage member groups
- Control access behavior with redirect URLs
- Add, import, export, or remove contacts
- Manage both contacts and members in one unified interface
By combining filters, segments, tags, and member groups, you can build a powerful, scalable system for managing relationships, access, and communication across your entire platform.