
Blog Post Settings
Blog Post Settings let you control how each individual blog post behaves, appears, and is published. These settings apply per post, giving you full flexibility without affecting the rest of your blog.
You’ll use Blog Post Settings to manage visibility, comments, sharing, URLs, tags, categories, authorship, and scheduling.
Blog Post Settings give you complete control over how each post appears, behaves, and performs – so you can adapt your content to your audience, strategy, and goals without compromise.
Where to Find Blog Post Settings
To access Blog Post Settings for a specific blog post:
- Go to Web Studio
- Click Pages
- Open Blog
- Click Add Post or open an existing post
- From the blog post editor, click Settings
This opens the Blog Post Settings panel, shown as a vertical panel to the left where all post-level options are managed.
Display & Visibility Options
These settings control which parts of the blog layout are shown for this specific post.

Show Sidebar
Toggle whether the blog sidebar appears when this post is viewed.
Use this when:
- You want readers to browse categories, tags, or related content
- You use CTAs, lead magnets, or navigation in the sidebar
Turn it off for distraction-free reading.
Show Header
Controls whether the blog header (hero section) is shown for this post
💡 Tip
Turning this off can be useful for long-form or editorial-style posts where you want content to start immediately.
Expanded Featured Image / Gallery
When enabled, the featured image or gallery is displayed in an expanded layout at the top of the post.
Best for:
- Visual storytelling
- Photography, inspiration, or brand-driven content
Comments & Engagement
Comments allow readers to interact with your blog content, ask questions, and share you content on social media. Recrevio supports two different comment systems, giving you flexibility depending on how open or controlled you want discussions to be.

Enable Comments (Member Comments)
When enabled, readers can comment on this specific post.
This activates Member Comments, which is the modern and recommended comment system in Recrevio.
Member Comments allow only logged-in, verified members to comment on blog posts.

Key features:
- Restricted access – Only verified members can post comments
- Higher-quality discussions – Reduces spam and anonymous noise
- Moderation notifications – Get alerts when new comments need review
- Direct replies – Respond to comments from within the moderation area
Best used for:
- Membership sites and communities
- Blogs connected to courses or programs
- Controlled, high-quality discussions
Enable Member Comments if you want meaningful engagement within a trusted audience.
Comments Approval
When enabled, all comments must be approved before they appear publicly.
Recommended:
Keep this enabled to prevent spam and maintain a high-quality, professional discussion space.
With approval enabled, you can review and moderate comments before they are published.
Legacy Comments
Legacy Comments are an older comment system designed for open participation.

How Legacy Comments work:
- Visitors can comment without logging in
- Readers may leave comments with or without an email address
- Lower friction for engagement and casual discussion
This makes Legacy Comments a simple way to encourage interaction, especially on public-facing blogs.
Managing Legacy Comments
If Legacy Comments are enabled, you can manage them directly from the post settings.
How to manage comments:
- Navigate to the Comments section in the post settings
- View existing comments from readers
- Approve comments (if approval is enabled)
- Delete comments that are inappropriate or unwanted
By moderating Legacy Comments, you can keep discussions valuable while still allowing open participation.
💡 Note
For new blogs, Legacy Comments are generally not recommended unless you specifically want open, non-authenticated commenting or need to keep existing comments from an older setup.
Choosing the Right Comment System
Use Member Comments if:
- You want controlled, high-quality discussions
- Your blog supports members or logged-in users
- You want better moderation and accountability
Use Legacy Comments if:
- You want open, login-free commenting
- Public discussion is more important than control
- You are maintaining an older blog setup
Add Share Buttons
Enable social sharing buttons for this post.
Available platforms:
- X (Twitter)
Best for:
- Tutorials
- Thought leadership
- Evergreen or high-value content
Tags
Tags help organize and surface related content across your blog.

How to Add Tags
- Click + in the Tags section
- Start typing to see existing tags
- Click a suggested tag to add it
- To create a new tag, type the name and press Enter or click +
You can add multiple tags per post.
Best practices:
- Use tags for themes or topics (e.g. SEO, Automation, Mindset)
- Keep tags consistent across posts
Categories
Categories group posts into larger sections.

How to Add Categories
- Click + in the Categories section
-
Start typing to see existing categories
- Select an existing one or create a new category using Enter or click +
- Multiple categories can be assigned to a single post
Best practices:
- Use categories for structure
- Avoid too many categories—clarity beats volume
Post URL (Slug)
The Post URL is automatically generated from your SEO Post Title.

You can edit this manually if needed.
Use this when:
- Improving SEO
- Shortening long URLs
- Matching an existing URL structure
💡 Tip
Avoid changing URLs after publishing unless necessary, as it may affect SEO.
Post Author
Set the author name displayed on the post.

Use cases:
- Personal blogs
- Guest authors
- Multi-author teams
- Brand + individual attribution
Post Date & Scheduling
The Post Date controls when the post is published.

- Select a future date to schedule the post
-
Choose time and date using the calendar picker
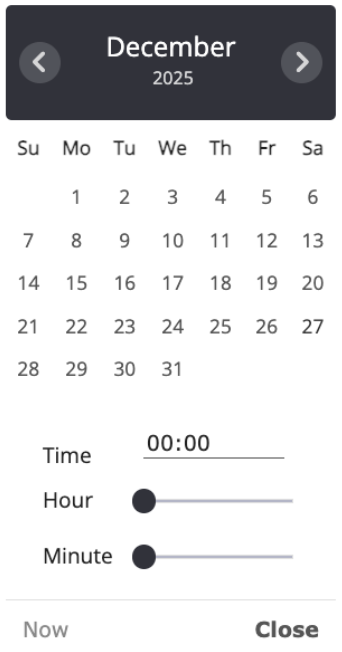
- The post will publish automatically at the selected time

Perfect for:
- Content planning
- Editorial calendars
- Consistent publishing schedules
How Blog Settings Work Together
Think of Blog Post Settings as your fine-tuning layer:
- Blog Settings → global behavior
- Header & Sidebar → layout structure
- Blog Post Settings → per-post control
This gives you full flexibility without duplication or plugins.
Save Your Changes
All changes are saved when you:
- Click Update (publish or update)
- Or Draft (save without publishing)
Always preview the post after adjusting settings to ensure layout and behavior look as expected.