
Facebook Pixel and Conversions API (CAPI)
Facebook Pixel & Conversions API (CAPI) in Recrevio
Facebook Pixel and Facebook Conversions API (CAPI) are essential tools for tracking, measuring, and optimizing your advertising across the Facebook ecosystem, including Instagram, Messenger, and the Meta Audience Network.
In this article, we’ll explain what Facebook Pixel and CAPI are, why they matter, and exactly how to set them up in Recrevio using the native integration.
What is Facebook Pixel?
Facebook Pixel is a browser-based tracking script that helps you understand what visitors do on your website or funnels.
It allows you to:
- Track important actions (called events)
- Measure ad performance
- Build custom audiences for retargeting
- Optimize ads for conversions
- Deliver more relevant ads to the right people
Facebook Pixel data is used inside Meta Ads Manager to improve campaign results across Facebook and Instagram.
Common use cases
- Retarget visitors who viewed a page but didn’t buy
- Track purchases from ads
- Optimize campaigns for leads, checkouts, or sales
- Create lookalike audiences based on real customer behavior
What is Facebook Conversions API (CAPI)?
Facebook Conversions API (formerly Server-Side API) sends events directly from Recrevio’s servers to Facebook, instead of relying only on the visitor’s browser.
This solves many modern tracking challenges:
- Ad blockers
- Browser privacy restrictions
- Cookie limitations (GDPR, iOS updates, etc.)
- Missing or incomplete data
Why Pixel + CAPI is the best setup
Facebook Pixel and CAPI work together:
- Pixel tracks browser-based events
- CAPI tracks server-side events
Together they:
- Improve data accuracy
- Reduce lost conversions
- Strengthen attribution
- Increase campaign optimization and reporting reliability
👉 We highly recommend enabling both.
Events Tracked Automatically in Recrevio
With Recrevio’s native Facebook integration, the following events are tracked automatically:
- PageView – triggered on every page view
- Lead – when a form is submitted or an appointment is booked
- AddToCart – when a product is added to the cart
- InitiateCheckout – when a checkout page is visited
- Purchase – when a checkout, upsell, or downsell is completed
- ViewContent – when a visitor views a product
- CompleteRegistration – when a user creates an account
No manual event coding is required.
Where to Set It Up in Recrevio
You can access the Facebook integration here:
Web Studio > Website Settings > Applications > Add Application > Facebook Pixel
Step 1: Add Your Facebook Pixel ID
- Open Web Studio
- Go to Website Settings
- Select Applications
- Click Add Application
-
Choose Facebook Pixel
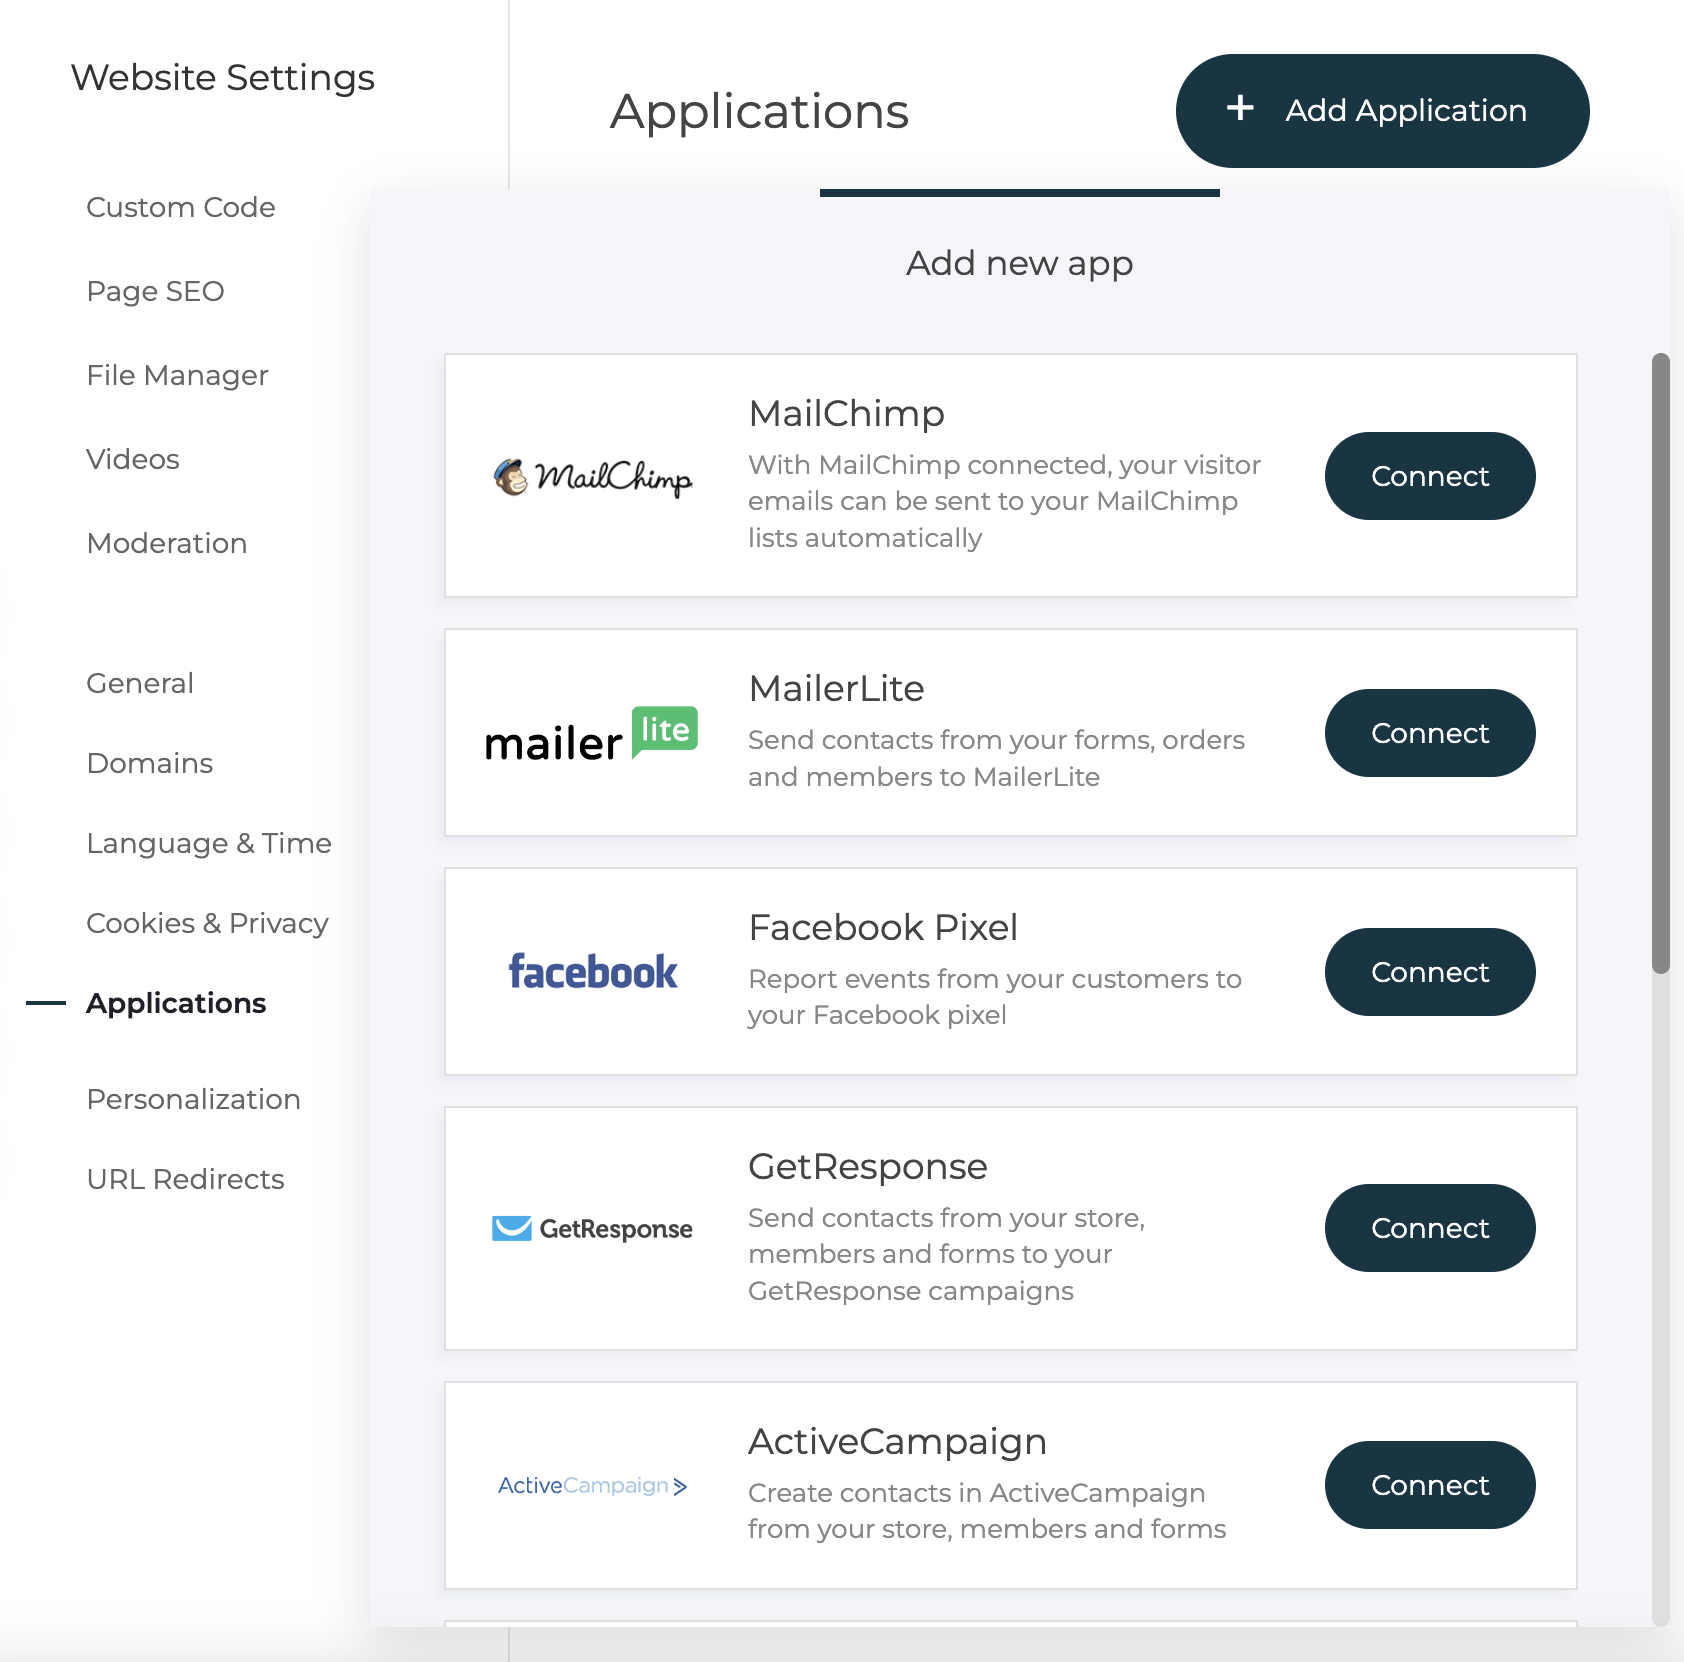
-
Paste your Facebook Pixel
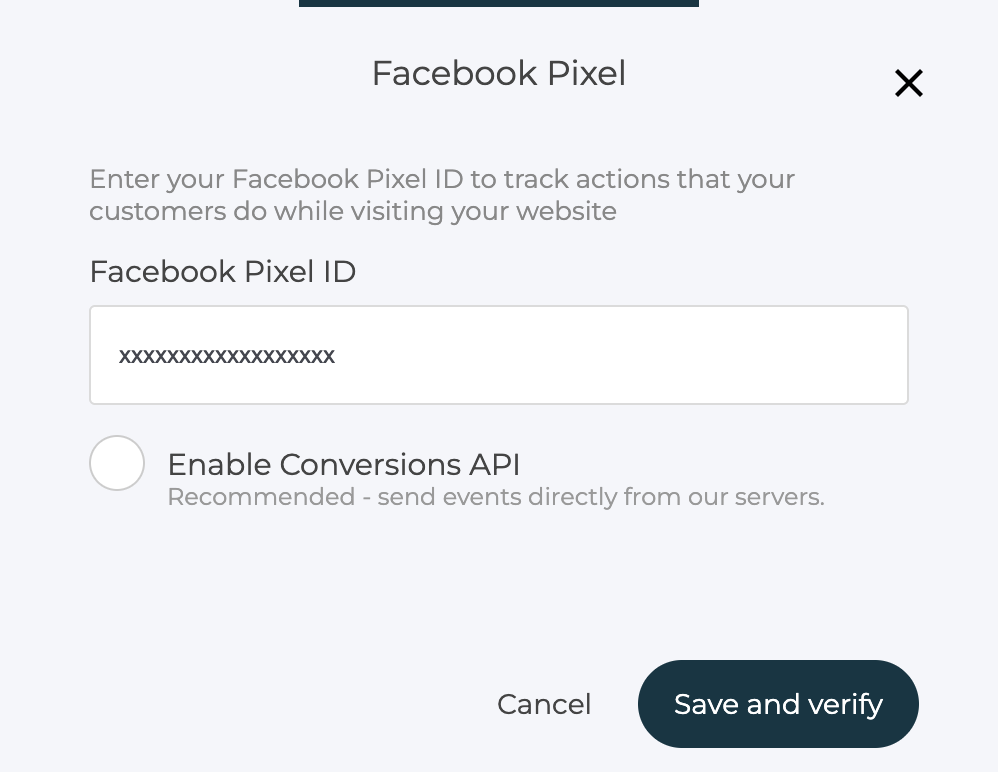
- Save and verify your settings


Don’t have a Pixel yet?
Create one inside Meta Ads Manager and copy the Pixel ID from your Pixel settings. Learn more about How to configure and install your Facebook Pixel in Meta support docs.
Step 2: Enable Facebook Conversions API (CAPI)
To enable CAPI, you’ll need an Access Token from your Facebook Pixel.
How to generate an Access Token
- Go to your Facebook Pixel
- Open Settings
- Scroll to Conversions API
- Choose Set up manually
-
Click Get Started or Generate Access Token
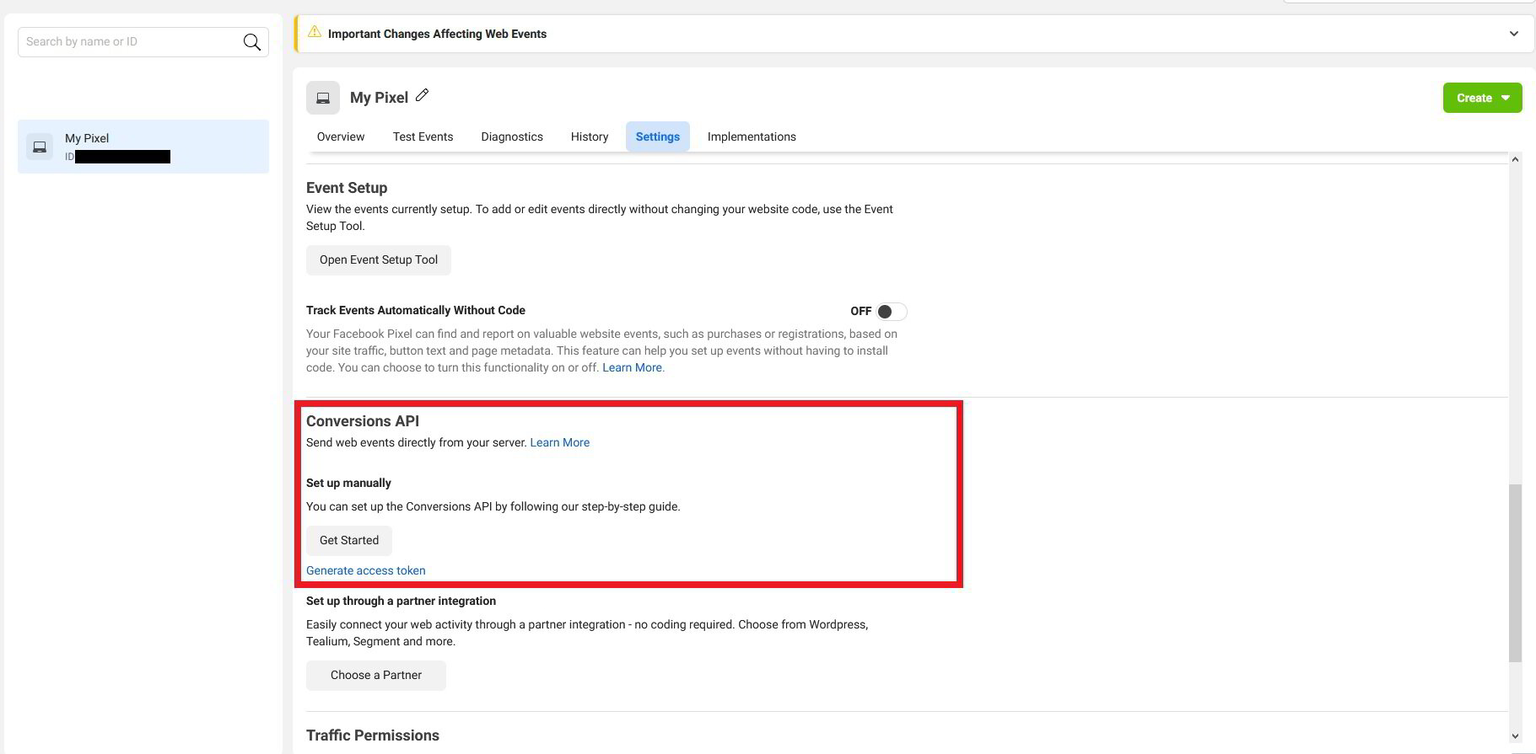
- Copy the generated token

Add the token in Recrevio
- Click Enable Conversions API
-
Paste the Access Token into the Facebook Pixel settings
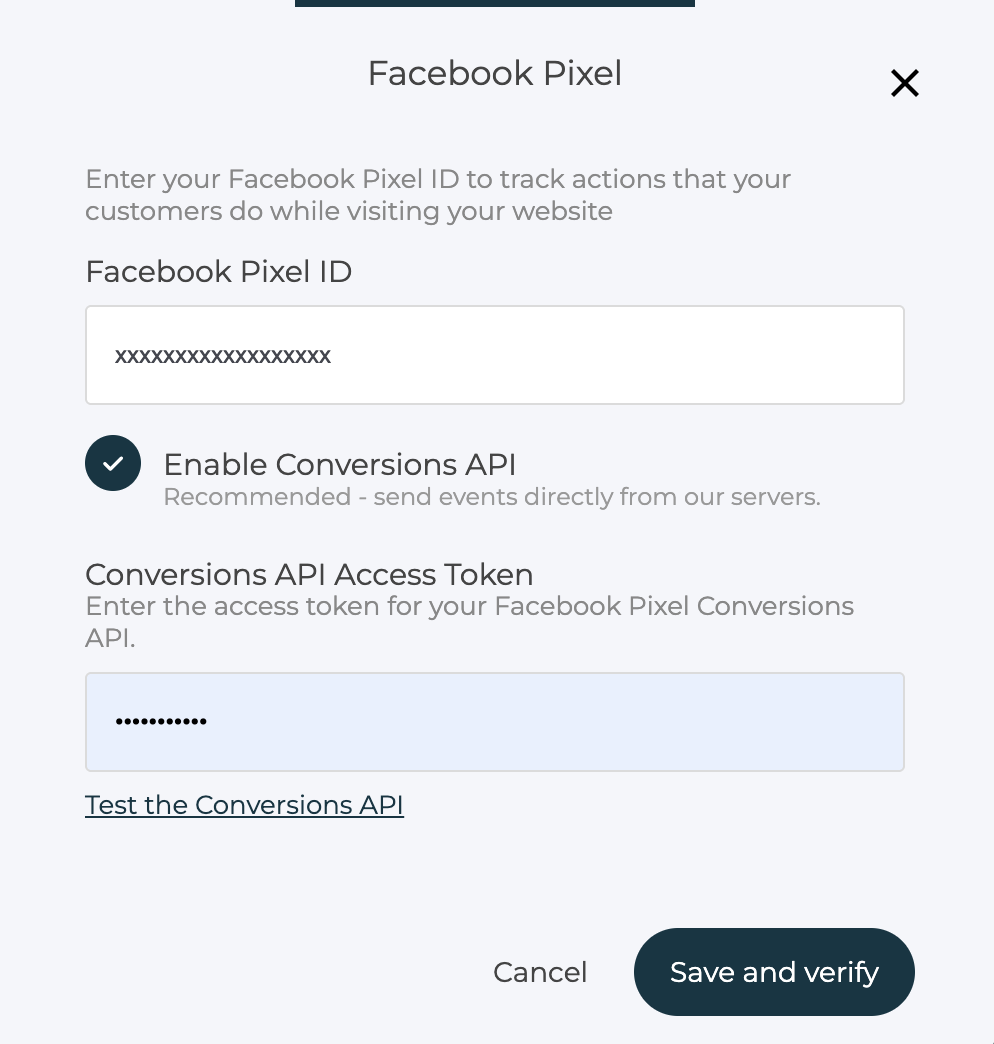
- Save and verify your changes

That’s it! 🎉
Events will now be sent both via browser (Pixel) and server-side (CAPI).
Important Notes
- Do not add Facebook Pixel manually via Custom Code if you use the native integration
- If you previously added the Pixel manually, remove it first
- Removing custom code will not affect your historical Facebook data
- Events may take up to 20 minutes to appear in your Pixel statistics
- PageView is browser-based only and not sent via CAPI