
How to use the Video Manager
The Native Video Hosting is a powerful solution that lets you upload, manage, and configure videos directly within your platform, without relying on third-party services.
What Happens After Uploading?
- Full Control Over Settings – Customize playback options, visibility, and engagement features.
- Flexible Display Choices – Embed videos, adjust layouts, and define how content appears.
- Optimized Performance – No external compression or platform restrictions—your videos, your way.
- Integrated Features – Connect videos to community posts, discussions, or learning modules effortlessly.
With Native Video Hosting, you streamline content delivery while ensuring a branded, high-performance experience for your audience.
Upload a Video
You can reach the Video Manger to upload or manage videos here:
- Navigate to Web studio > Website Settings > Videos
- Dragging and dropping a Video or Video Playlist widget onto a page, funnel step, or Circle page.

Once the Video Manager pop-up appears, you’ll have several options for organizing and managing your videos:
- Add a New Video – Upload fresh content directly into the platform.
- Create Folders – Keep videos structured by grouping them into custom folders.
- Edit Existing Videos – Modify previously uploaded content, including settings and display preferences.
💡 Top Tip – Organizing Videos for Courses & Playlists
If you're planning to create courses or structured playlists, it's best to set up individual folders to keep everything organized. This approach helps you:
- Easily manage video content – Quickly find and update specific lessons or topics.
- Improve accessibility – Ensure videos are logically grouped for effortless navigation.
- Streamline course development – Maintain a clear structure as your content expands over time.
By organizing videos into dedicated folders, you create a smooth, user-friendly experience while keeping everything structured for future updates.
Let's open the folder we have just created called 'My Videos' – in here you'll be able to upload your video content. Click any of the +Upload A Video tabs to start.

Upon clicking the + Upload A Video button - It will open your desktop files section for you to upload a video. Once the video has been selected it will open the Video settings display.

Video Title
Assigning a clear and relevant name to your video is essential for seamless integration across your platform. This title will be visible when:
- Adding the video to playlists – Ensuring easy identification within structured content.
- Including it in a course curriculum – Helping learners find and navigate lessons effortlessly.
- Managing your media library – Keeping videos organized for future updates.
A well-chosen title ensures your content remains accessible, professional, and easy to locate.
Video Description
Your video description helps provide context, details, and key information about the content. It will be visible when adding the video to playlists, courses, and other sections.
A strong description can:
- Explain the purpose of the video.
- Highlight important details or timestamps.
- Improve searchability within your platform.
💡 Tip – Controlling Video Titles & Descriptions
You can disable the video title and description when embedding videos into your pages, ensuring a cleaner and more streamlined display.
This is useful for:
- Keeping layouts minimal and distraction-free.
- Blending videos seamlessly into the design.
- Allowing users to focus purely on the video content without extra text.
Thumbnail
A video thumbnail is the preview image that represents your video before it’s played. You can upload a custom thumbnail to make the video more visually appealing and recognizable.
This helps with:
- Better Engagement – A compelling thumbnail can encourage more views.
- Clear Identification – Helps users quickly recognize the video’s topic.
- Branding Consistency – Keeps your visuals aligned with your overall design.
When adding your thumbnail it will open directly in your built-in file manager
Categories
Organizing your videos into categories makes it easier for users to find specific content, especially when using the Video Playlist Widget with a filtering tab.
Benefits of categorizing videos:
- Improves Navigation – Users can quickly filter by category to locate relevant videos.
- Keeps Content Organized – Helps structure different types of videos for clarity.
- Enhances User Experience – Simplifies the browsing process, making discovery effortless.
Video Chapters
Enhance the viewing experience with Video Chapters, allowing members to divide their videos into multiple sections for easy navigation.
Key Features:
- Multiple Chapters – Break down content into structured segments for better organization.
- Tooltip Pop-Out Display – Hover over a chapter to preview its details before selecting.
- Streamlined Playback – Jump directly to the section that matters most, eliminating unnecessary scrolling.
With Video Chapters, users can quickly find key moments, making long-form content more engaging, accessible, and interactive.
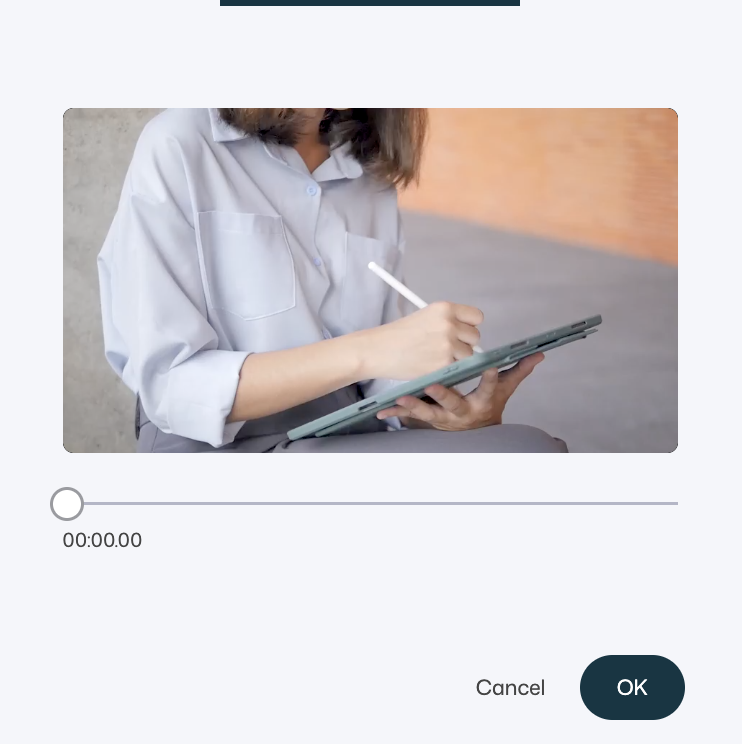
How to add a Video Chapter
Organizing your video into chapters makes it easier for viewers to navigate key moments efficiently. Here's how to do it:
- Select the "Video Chapters" tab to access the chapter management window.
- Click "Add Chapter" to begin creating a new chapter.
-
Choose a timestamp - position the chapter at the exact point in the video where you want a reference.
-
Name the chapter - this serves as a clear reference for viewers, helping them jump to relevant sections instantly.
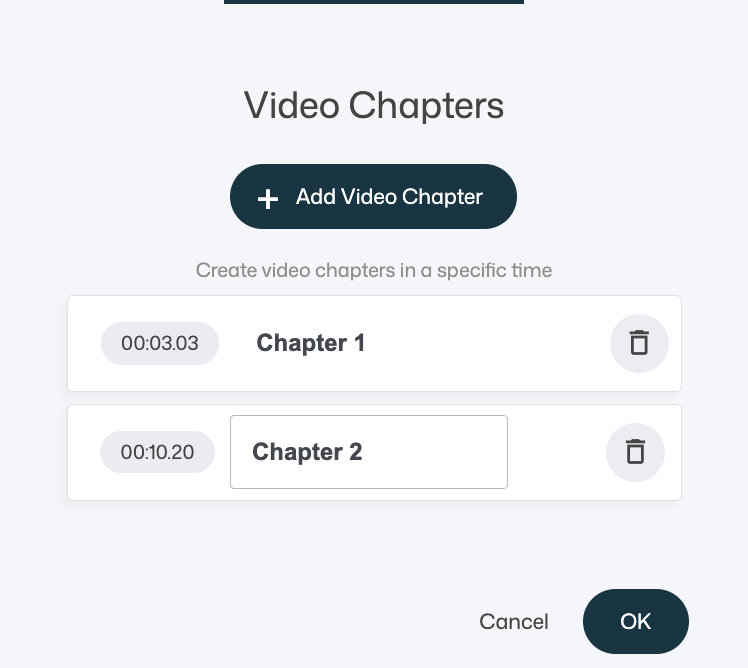


Once you’ve added chapters, they will be displayed in a structured list for easy access and management.
- Edit Chapters – Modify chapter names or adjust their positions to refine navigation.
- Delete Chapters – Remove any unnecessary chapters to keep your video organized.
This setup ensures a clear, customizable experience, making it simple to fine-tune how viewers engage with your content.
Comments
Here is where you can add comments to the video.
Note: You can enable and disable comments when adding your videos to a page and also a playlist.
Captions
Adding captions ensures your video is accessible and enhances viewer comprehension. Here’s how to upload and manage them:
- Click the "Captions" option in the video settings.
- Upload your captions file in VTT format.
- Select the language to match your video’s content.
- Enable automatic display – captions will appear when the video plays (this setting can be toggled).
- Viewers can disable captions by clicking the CC icon on the video player.
This feature helps improve accessibility while offering viewers control over their experience.
Share
With the Share feature, you can embed your video in external platforms, emails, or anywhere that supports video embedding.
Here you can configure how the video should behave and appear before generating the embed code.

Available settings
-
Remove controls
Hides the video player controls for a cleaner, more minimal viewing experience.
-
Autoplay
Starts playing the video automatically when the page loads (note that autoplay behavior may be affected by browser restrictions).
-
Loop video
Automatically restarts the video when it reaches the end.
-
Pause video on lost focus
Pauses playback when the user switches tabs or navigates away from the page where the video is playing.
-
Responsive
Ensures the video automatically scales to fit the container it’s placed in.
Recommended for most use cases.
-
Use video loop as thumbnail
Uses a short loop from the video as a dynamic thumbnail.
The loop must be between 0.5 and 5 seconds in length.
Embed your video
Once your settings are configured:
- Click Copy to copy the embed code
- Paste the code into your website, emails, or any platform that supports embedded videos
This allows you to display your videos outside the native platform while still maintaining full control over playback, appearance, and behavior.
💡 Tip
When embedding your video, any additional options you’ve configured - such as captions and chapters—will also be included. This ensures a consistent experience across different platforms while maintaining all interactive elements.
By embedding videos with full customization, viewers can still benefit from structured navigation, accessibility features, and playback settings, no matter where the video is shared.