
How to Create and Manage Digital Products
Digital Products are perfect for selling knowledge, files, and online resources—instantly and at scale—without handling shipping, inventory, or logistics. They allow you to deliver value immediately after purchase while keeping your setup simple and highly automated.
With Digital Products in Recrevio, customers receive a secure download link as soon as their purchase is complete. For security and control, each download link automatically expires after 24 hours, helping protect your content from unauthorized sharing.
💡 Note
Please make sure that the System Email for Digital products & membership access is enable to ensure customers get the download link sent out by email.
Digital Products are ideal for selling:
- PDFs, guides, and workbooks
- E-books and reports
- Templates, planners, and spreadsheets
- Design assets, resources, and files
- Audio files, recordings, or downloadable media
- One-time digital resources that don’t require ongoing access
This article walks through every section of the Digital Product editor, from top to bottom, explaining each setting and offering best-practice recommendations so you can confidently create, price, and deliver digital products that convert and scale with your business.
Creating a Digital Product
To create a Physical Product:
- Go to Products → All Products
- Click Add Product
- Select Digital Product as the product type
This opens the product editor, which is divided into three main areas:
- Main product details (left column)
- Product settings & media (right column)
- Advanced product options (sections below)
1. Main Product Area (Top Left)
This is where you define the core information about your product.
Product Title
Enter the name of your product as it will appear:
- In your store
- On checkout pages
- In order confirmations
- In emails and receipts
💡 Tip – Product Names for Digital Products
Use clear, benefit-driven names that immediately communicate what the customer will get. Focus on the outcome or value rather than internal details.
For example:
- Use “Instagram Content Planner (PDF)” instead of “Planner v3 – Final”
- Use “30-Day Meal Plan for Busy Professionals” instead of “Meal Plan Download”
If your digital product includes multiple formats, versions, or files, keep the product title simple and describe the details in the description or using additional options—rather than overloading the product name.
Description
The description will be displayed in the built-in store. You can describe your product using either:
-
Simple Editor – clean text-based description
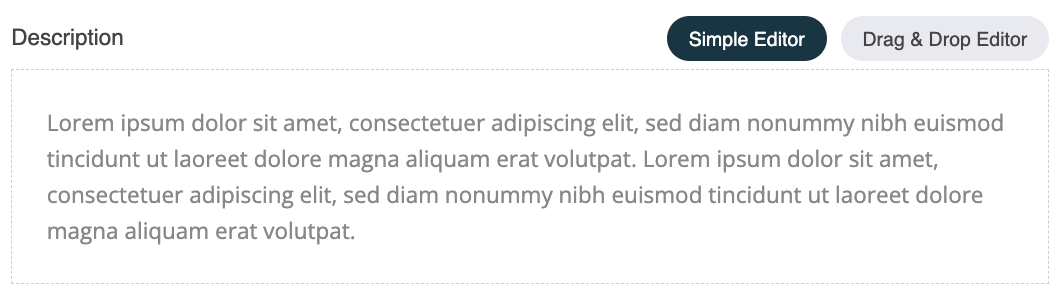
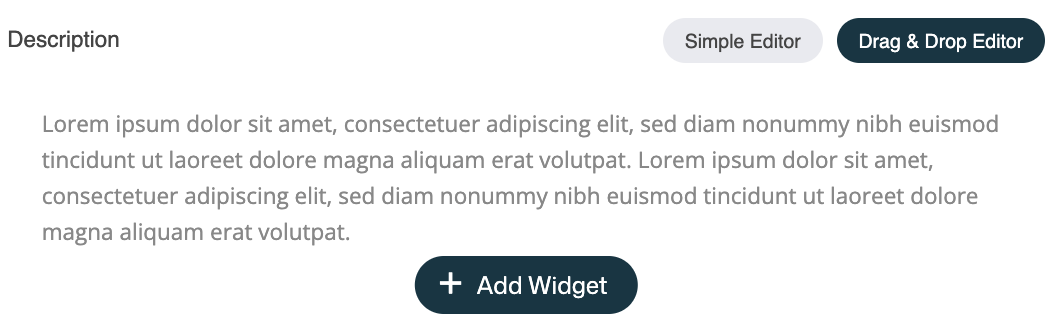
-
Drag & Drop Editor – opens the web studio controls so you can add any widget – this enables richer layouts with sections, images, and formatting. Simply click the Add Widget button to open the widget panel to the left and drag and drop any widget to the discription field.


Use the description to explain:
- What the product is
- Who it’s for
- What’s included
- Key benefits or features
💡 Tip – Use the AI Writing Assistant for Product Descriptions
You can use the built-in AI Writing Assistant to quickly create or improve your product description.

Generate a description from the product title, expand or shorten existing text, or refine the wording to make it clearer and more compelling.
This is especially helpful if:
- You want a quick starting point
- You need help structuring your copy
- You want to improve clarity or tone
👉 See separate article: Using the AI Writing Assistant
Price

Set the base price of the product.
Available options:
- Standard Price – Sets the regular price for the product.
- On Sale – Display the original price as strikethrough in checkouts, highlighting a discounted sale price.
- Subscription Product – Enables recurring payments by charging customers on a repeating schedule.
Subscription Product
If enabled, the product becomes a recurring or installment-based product.

You can chose:
- Billing cycles
-
Ongoing Payments
Charges continue indefinitely until canceled, e.g. charging every month for monthly plans and every 12 months for annual plans.
-
Installments
Chose a fixed number of payments (2–52 installments)
-
-
Charge every
Chose the payment frequency to every 1–12 weeks or 1–12 months
💡 Tip – Installments for Digital Products
Digital Products are delivered as downloadable files, which makes subscriptions uncommon for this product type. Instead, installment payments are best suited for higher-priced digital products where you want to lower the upfront cost.
Use installments when:
- The digital product has a higher price point
- You want to make the purchase more accessible
- The content is delivered as a single downloadable file
Examples:
- A premium course workbook or resource bundle
- A comprehensive template pack
- A certification or advanced training material delivered as downloads
💡 Best practice
If your digital product requires ongoing access, recurring content, or gated materials, consider using a Membership product instead. Memberships are designed for subscriptions and recurring value, while Digital Products are optimized for one-time downloads.
SKU (Stock Keeping Unit)
An optional internal identifier for:
- Inventory management
- Accounting
- Fulfillment systems
💡 Tip – SKU for Digital Products
SKUs are optional for digital products and often not required, since there is no physical inventory or fulfillment involved.
Use a SKU only if you:
- Integrate with accounting or reporting systems
- Want internal product identifiers for organization
- Sell the same digital product across multiple channels
Otherwise, you can safely leave the SKU field empty for most digital products.
Product Type
This is pre-set to the product type chosen when creating the product. The product type determines which fields are shown. Once the product has been created this canät be changed.
Available options:
- Physical product
- Digital product
- Service
- Membership
Product File (Digital Products)
Digital products are delivered as downloadable files after purchase. In this section, you connect the file that customers will receive once their order is completed.

To attach a file to your digital product:
- Click the Product File field.
-
The File Manager opens.

- Choose an existing file or upload a new one.
- Click Select to attach the file to the product.

The File Manager allows you to:
- Upload new files
- Organize files into folders
- Reuse the same file across multiple products
- Manage images and downloadable assets in one place
Once a customer completes their purchase:
- They receive a secure, unique download link
- The link is sent automatically via email
- The download link is active for 24 hours after the first download
- Each customer receives their own individual link
This ensures:
- Secure file delivery
- Reduced risk of file sharing
- Controlled access to your digital content
💡 Important
If a customer needs access again after the link expires, you can manually resend or regenerate access from the order or customer view.
Supported Use Cases
Digital Product files are ideal for:
- PDFs and workbooks
- E-books
- Templates (Canva, Notion, spreadsheets, etc.)
- Audio files
- Video files
- ZIP files with bundled content
💡 Tip
If your product includes multiple files, consider:
- Uploading a single ZIP file
- Or delivering access via a Membership or Circle instead, if long-term access is required
2. Right Column – Media & Visibility Settings
This column controls how your product looks and behaves externally.
Product Images
Add one or more images to visually represent your product.
Images are used in:
- Store listings
- Product pages
- Checkouts
- Emails and receipts
💡 Tip
Use multiple images showing different angles, details, or usage scenarios. Especially important for physical products.
Product Categorization
Assign the product to one or more categories or subcategories. You can also create and assign new categories during the product creation process by clicking the + icon in the Select Product Categories popup:

Categories help:
- Organize your store
- Improve navigation
- Enable filtering
💡 Note
Products are assigned to categories individually (not in bulk).
Hidden Product
When enabled:
- The product is hidden from the store
- Still usable in direct links, funnels, as upsells/downsells or automations using the checkout widget
💡 Use case
Private offers, upsells, or invite-only products.
Product Page URL
Defines the URL slug for the product page.
Example:
/product/product-name
💡 Tip: Keep URLs short, readable, and keyword-friendly.
SEO Settings
Control:
- Page title
- Meta description
💡 Tip – Use the AI Writing Assistant for SEO Title & Description
You can use the built-in AI Writing Assistant to quickly create or refine your SEO Title and SEO Description.
Click Generate via AI to automatically generate an optimized SEO title and SEO description based on your product page (in this case basically the Product name and Product description).
You can also use the AI controls to:
- Improve existing text
- Expand or shorten your SEO copy
- Fine-tune wording for clarity, tone, and search visibility
This is especially helpful if:
- You want SEO-friendly text without starting from scratch
- You need help fitting within recommended character limits
- You want clearer, more compelling search snippets
👉 See separate article: Using the AI Writing Assistant
3. Advanced Product Options (Below Main Area)
These sections add deeper functionality to your product.
Track Inventory
Enable this to:
- Track available quantity
- Show remaining stock
- Get notified when inventory runs low
💡 Tip
Leave inventory tracking disabled for most digital products unless you intentionally want to limit access or availability.
Custom Thank You Page
Optionally redirect customers to a custom page after purchase.

Use this for:
- Post-purchase instructions
- Upsells
- Onboarding steps
- Delivery expectations
Additional Questions
Ask customers for extra information before adding to cart.
Examples:
- Engraving text
- Gift message
- Custom notes
💡 Tip
Keep questions minimal to avoid friction during checkout.
Tag Customers
Automatically apply tags to customers after purchase.

Tags can be used in:
- Automations
- Email segmentation
- CRM filtering
💡 Example
Tag customers with digital-product-buyer .
Saving Your Product
When all settings are complete:
- Click Save Changes
- The product becomes available based on its visibility settings
Best Practices for Digital Products
Use clear, benefit-driven product names
Focus on what the customer will get or achieve (e.g. “Instagram Content Templates” instead of “Template Pack #3”).
Write a strong product description
Clearly explain:
- What the file includes
- How it’s used
- Who it’s for
- What problem it solves
Use visuals even for downloads
Add cover images or preview graphics to make digital products feel tangible and trustworthy.
Keep file delivery simple and secure
Upload the correct file and verify that the download link works as expected. Remember that download links expire 24 hours after first use.
Avoid subscriptions unless there’s a clear reason
Most digital products are one-time purchases. Use installment payments only for higher-priced digital offers.
Skip inventory tracking unless limiting access
Digital products usually don’t require stock limits – enable inventory tracking only if you want controlled or limited availability.
Test the full purchase flow
Before launching:
- Complete a test purchase
- Download the file
- Check confirmation emails and the Thank You page
💡 Tip
A smooth download experience is critical for digital products. Always test from the customer’s perspective before going live.