
How to Create and Send an SMS Message Campaign
This guide walks you through how to create and send a SMS Message Campaign from start to finish in Recrevio.
We cover everything needed to send a SMS campaign, including audience selection, message settings, and sending options.
Before you start (required)
To send SMS, WhatsApp, or Voice messages, you must connect Twilio first.
👉 See: Twilio Integration on how to setup your Twilio Integration in Recrevio
👉 See the separate articles on How to Enable Sales Tracking in Campaigns and Automations and How to Analyze Campaign Performance for full details on how to measure and analyze SMS campaigns.
Step 1: Go to Create Campaign
Navigate to: Marketing > Campaigns > Create Campaign
You’ll start by selecting the campaign flow.
Step 2: Select campaign flow
Choose the channel you want to use:

- Email Campaign – send email campaigns to your subscribers
- SMS / WhatsApp / Voice Campaign – send message campaigns to your subscribers
Click SMS / WhatsApp / Voice Campaign to continue.
Step 3: Name your campaign
Enter a Campaign Name.
This name is for internal use only and helps you identify the campaign later in lists and analytics.

Click Next to continue.
Step 4: Select campaign type (SMS, WhatsApp, or Voice)
Choose the type of message campaign you want to create.

- SMS Campaign
- WhatsApp Campaign
- Voice Campaign
Choose SMS Campaign and click Next to continue.
Step 5: Select recipients (lists & segments)
In the Recipients step, choose who will receive your campaign.

You can select:
Lists
Static groups of subscribers (e.g. “Newsletter”, “Customers”, “Event signups”).
Segments
Dynamic audiences based on filters (e.g. “Active members”, “Clicked last 30 days”).
For each list or segment, you can:
- Include it (send to these people)
- Exclude it (remove these people from the final audience)
You’ll see the total recipient count update as you select recipients.
Click Next to continue.
Step 6: Campaign summary & message settings
This step lets you review key settings and write your message.
Campaign Type
This shows the channel selected for the campaign.
The campaign type determines:
- How the message is delivered (SMS, WhatsApp, or Voice)
- Which message editor and options are available
- Which Twilio services are used in the background
The type is set earlier in the campaign flow and cannot be changed at this stage. You can go back and change the Campaign Type at the Type step in the Setup process.
Sales tracking (optional)
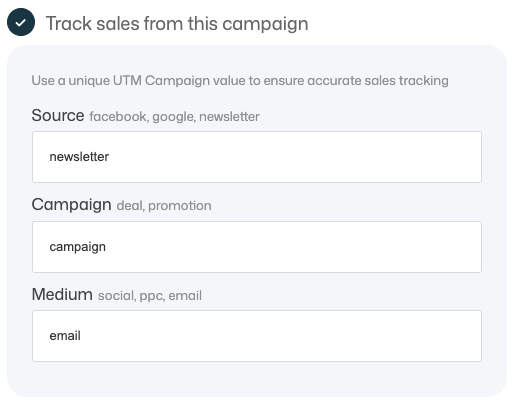
You can enable Track sales from this campaign.
When enabled, you can define:
- Source (e.g. newsletter, facebook, google)
- Campaign (e.g. launch, deal, promotion)
- Medium (e.g. email, social, ppc)
These values are used to generate UTM tracking links and connect email clicks to sales data.
👉 See the separate articles on How to Enable Sales Tracking in Campaigns and Automations and How to Analyze Campaign Performance for full details on how to measure and analyze SMS campaigns.
Recipients
The Recipients section lets you review who will receive the campaign before sending.

Here you can see:
- The total number of recipients
- Which list or segment the campaign is being sent to
If the recipient count doesn’t look correct, you can go back to the Recipients step to adjust your list or segment selection before sending the campaign.
Write your SMS message
In the Message section:
Type your SMS content in the message box.
You'll also have options to:
- Add tag – use personalization tags to personalize the SMS content (example:
{first_name}). - Send Test – send a test message to verify formatting and content before sending to the full audience
- Character counter – shows how long the message is (helpful for keeping SMS concise)
Note
If you see a banner like “Please connect a Twilio account to send messages”, it means Twilio isn’t connected yet.
Connect Twilio first, then return to the campaign.
👉 See: Twilio Integration on how to setup you Twilio-integration in Recrevio.
Click Next to continue.
Step 7: Send or schedule the campaign
In the final step, choose when to send your campaign:
Send options
- Draft – save without sending
- Now – send immediately
- Later – schedule for a specific date and time
When everything looks correct, click Send Campaign.
What happens next?
- All campaigns (sent or draft) appear in Marketing > Campaigns
- Drafts remain editable and can be resumed anytime
- Performance data becomes available after sending
Summary
Creating a message campaign follows these steps:
- Go to Marketing > Campaigns > Create Campaign
- Select Campaign Flow (SMS, WhatsApp or Voice)
- Name the campaign
- Select campaign type: SMS
- Select recipients (lists/segments + include/exclude)
- Review settings and write your message
- Send now, later, or save as draft